and Shadertoy
Shadertoy is a famous website hosting amazing shader experiments. People often ask how they can use those shaders with Three.js.
It's important to recognize it's called ShaderTOY for a reason. In general shadertoy shaders are not about best practices. Rather they are a fun challenge similar to say dwitter (write code in 140 characters) or js13kGames (make a game in 13k or less).
In the case of Shadertoy the puzzle is, write a function that for a given pixel location outputs a color that draws something interesting. It's a fun challenge and many of the result are amazing. But, it is not best practice.
Compare this amazing shadertoy shader that draws an entire city
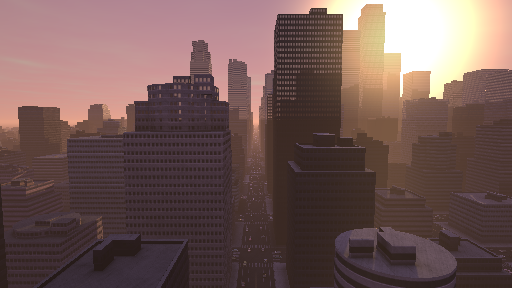
Fullscreen on my GPU it runs at about 5 frames a second. Contrast that to a game like Cities: Skylines
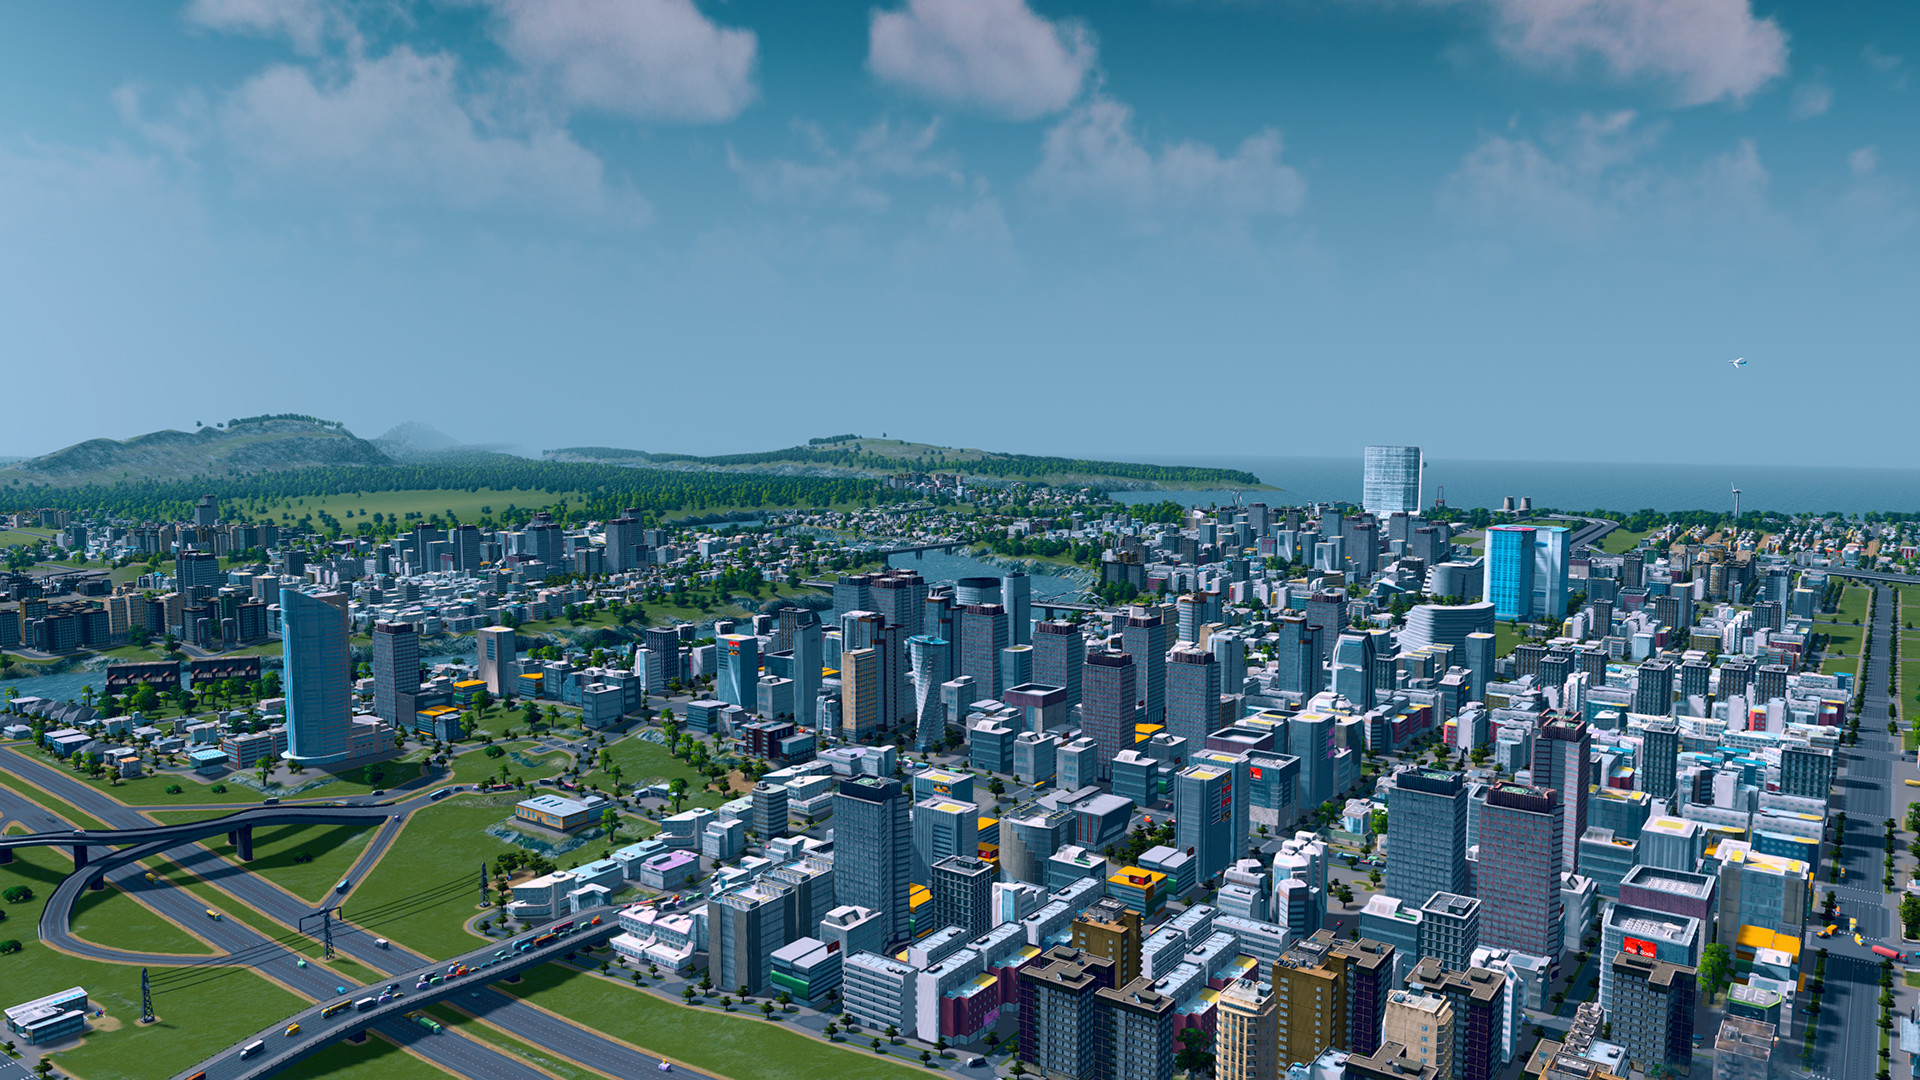
This game runs 30-60 frames a second on the same machine because it uses more traditional techniques, drawing buildings made from triangles with textures on them, etc...
Still, let's go over using a Shadertoy shader with three.js.
This is the default shadertoy shader if you pick "New" on shadertoy.com, at least as of January 2019.
// By iq: https://www.shadertoy.com/user/iq
// license: Creative Commons Attribution-NonCommercial-ShareAlike 3.0 Unported License.
void mainImage( out vec4 fragColor, in vec2 fragCoord )
{
    // Normalized pixel coordinates (from 0 to 1)
    vec2 uv = fragCoord/iResolution.xy;

    // Time varying pixel color
    vec3 col = 0.5 + 0.5*cos(iTime+uv.xyx+vec3(0,2,4));

    // Output to screen
    fragColor = vec4(col,1.0);
}
One thing important to understand about shaders is they are written in a
language called GLSL (Graphics Library Shading Language) designed for 3D math
which includes special types. Above we see vec4, vec2, vec3 as 3 such
special types. A vec2 has 2 values, a vec3 3, a vec4 4 values. They can be
addressed in a bunch of ways. The most common ways are with x, y, z, and
w as in
vec4 v1 = vec4(1.0, 2.0, 3.0, 4.0);
float v2 = v1.x + v1.y;  // adds 1.0 + 2.0
Unlike JavaScript, GLSL is more like C/C++ where variables have to have their
type declared so instead of var v = 1.2; it's float v = 1.2; declaring v
to be a floating point number.
Explaining GLSL in detail is more than we can do in this article. For a quick overview see this article and maybe follow that up with this series.
It should be noted that, at least as of January 2019, shadertoy.com only concerns itself with fragment shaders. A fragment shader's responsibility is, given a pixel location output a color for that pixel.
Looking at the function above we can see the shader has an out parameter
called fragColor. out stands for output. It's a parameter the function is
expected to provide a value for. We need to set this to some color.
It also has an in (for input) parameter called fragCoord. This is the pixel
coordinate that is about to be drawn. We can use that coordinate to decide on a
color. If the canvas we're drawing to is 400x300 pixels then the function will
be called 400x300 times or 120,000 times. Each time fragCoord will be a
different pixel coordinate.
There are 2 more variables being used that are not defined in the code. One is
iResolution. This is set to the resolution of the canvas. If the canvas is
400x300 then iResolution would be 400,300 so as the pixel coordinates change
that makes uv go from 0.0 to 1.0 across and up the texture. Working with
normalized values often makes things easier and so the majority of shadertoy
shaders start with something like this.
The other undefined variable in the shader is iTime. This is the time since
the page loaded in seconds.
In shader jargon these global variables are called uniform variables. They are called uniform because they don't change, they stay uniform from one iteration of the shader to the next. It's important to note all of them are specific to shadertoy. They not official GLSL variables. They are variables the makers of shadertoy made up.
The Shadertoy docs define several more. For now let's write something that handles the two being used in the shader above.
The first thing to do is let's make a single plane that fills the canvas. If you haven't read it yet we did this in the article on backgrounds so let's grab that example but remove the cubes. It's pretty short so here's the entire thing
function main() {
  const canvas = document.querySelector('#c');
  const renderer = new THREE.WebGLRenderer({canvas});
  renderer.autoClearColor = false;

  const camera = new THREE.OrthographicCamera(
    -1, // left
     1, // right
     1, // top
    -1, // bottom
    -1, // near,
     1, // far
  );
  const scene = new THREE.Scene();
  const plane = new THREE.PlaneGeometry(2, 2);
  const material = new THREE.MeshBasicMaterial({
      color: 'red',
  });
  scene.add(new THREE.Mesh(plane, material));

  function resizeRendererToDisplaySize(renderer) {
    const canvas = renderer.domElement;
    const width = canvas.clientWidth;
    const height = canvas.clientHeight;
    const needResize = canvas.width !== width || canvas.height !== height;
    if (needResize) {
      renderer.setSize(width, height, false);
    }
    return needResize;
  }

  function render() {
    resizeRendererToDisplaySize(renderer);

    renderer.render(scene, camera);

    requestAnimationFrame(render);
  }

  requestAnimationFrame(render);
}

main();
As explained in the backgrounds article an
OrthographicCamera with these parameters and a 2 unit plane will fill the
canvas. For now all we'll get is a red canvas as our plane is using a red
MeshBasicMaterial.
Now that we have something working let's add the shadertoy shader.
const fragmentShader = `
#include <common>

uniform vec3 iResolution;
uniform float iTime;

// By iq: https://www.shadertoy.com/user/iq
// license: Creative Commons Attribution-NonCommercial-ShareAlike 3.0 Unported License.
void mainImage( out vec4 fragColor, in vec2 fragCoord )
{
    // Normalized pixel coordinates (from 0 to 1)
    vec2 uv = fragCoord/iResolution.xy;

    // Time varying pixel color
    vec3 col = 0.5 + 0.5*cos(iTime+uv.xyx+vec3(0,2,4));

    // Output to screen
    fragColor = vec4(col,1.0);
}

void main() {
  mainImage(gl_FragColor, gl_FragCoord.xy);
}
`;
Above we declared the 2 uniform variables we talked about. Then we inserted the
shader GLSL code from shadertoy. Finally we called mainImage passing it
gl_FragColor and gl_FragCoord.xy. gl_FragColor is an official WebGL
global variable the shader is responsible for setting to whatever color it wants
the current pixel to be. gl_FragCoord is another official WebGL global
variable that tells us the coordinate of the pixel we're currently choosing a
color for.
We then need to setup three.js uniforms so we can supply values to the shader.
const uniforms = {
  iTime: { value: 0 },
  iResolution:  { value: new THREE.Vector3() },
};
Each uniform in THREE.js has value parameter. That value has to match the type
of the uniform.
Then we pass both the fragment shader and uniforms to a ShaderMaterial.
-const material = new THREE.MeshBasicMaterial({
-    color: 'red',
-});
+const material = new THREE.ShaderMaterial({
+  fragmentShader,
+  uniforms,
+});
and before rendering we need to set the values of the uniforms
-function render() {
+function render(time) {
+  time *= 0.001;  // convert to seconds

  resizeRendererToDisplaySize(renderer);

+  const canvas = renderer.domElement;
+  uniforms.iResolution.value.set(canvas.width, canvas.height, 1);
+  uniforms.iTime.value = time;

  renderer.render(scene, camera);

  requestAnimationFrame(render);
}
Note: I have no idea why
iResolutionis avec3and what's in the 3rd value is not documented on shadertoy.com. It's not used above so just setting it to 1 for now. ¯\_(ツ)_/¯
This matches what we see on Shadertoy for a new shader, at least as of January 2019 😉. What's the shader above doing?
uvgoes from 0 to 1.cos(uv.xyx)gives us 3 cosine values as avec3. One foruv.x, another foruv.yand another foruv.xagain.- Adding in the time,
cos(iTime+uv.xyx)makes them animate. - Adding in
vec3(0,2,4)as incos(iTime+uv.xyx+vec3(0,2,4))offsets the cosine waves cosgoes from -1 to 1 so the0.5 * 0.5 + cos(...)converts from -1 <-> 1 to 0.0 <-> 1.0- the results are then used as the RGB color for the current pixel
A minor change will make it easier to see the cosine waves. Right now uv only
goes from 0 to 1. A cosine repeats at 2π so let's make it go from 0 to 40 by
multiplying by 40.0. That should make it repeat about 6.3 times.
-vec3 col = 0.5 + 0.5*cos(iTime+uv.xyx+vec3(0,2,4));
+vec3 col = 0.5 + 0.5*cos(iTime+uv.xyx*40.0+vec3(0,2,4));
Counting below I see about 6.3 repeats. We can see the blue between the red
since it's offset by 4 via the +vec3(0,2,4). Without that the blue and red
would overlap perfectly making purple.
Knowing how simple the inputs are and then seeing results like a city canal, a forest, a snail, a mushroom make the challenge all that much more impressive. Hopefully they also make it clear why it's not generally the right approach vs the more traditional ways of making scenes from triangles. The fact that so much math has to be put into computing the color of every pixel means those examples run very slow.
Some shadertoy shaders take textures as inputs like this one.
// By Daedelus: https://www.shadertoy.com/user/Daedelus
// license: Creative Commons Attribution-NonCommercial-ShareAlike 3.0 Unported License.
#define TIMESCALE 0.25
#define TILES 8
#define COLOR 0.7, 1.6, 2.8

void mainImage( out vec4 fragColor, in vec2 fragCoord )
{
    vec2 uv = fragCoord.xy / iResolution.xy;
    uv.x *= iResolution.x / iResolution.y;

    vec4 noise = texture2D(iChannel0, floor(uv * float(TILES)) / float(TILES));
    float p = 1.0 - mod(noise.r + noise.g + noise.b + iTime * float(TIMESCALE), 1.0);
    p = min(max(p * 3.0 - 1.8, 0.1), 2.0);

    vec2 r = mod(uv * float(TILES), 1.0);
    r = vec2(pow(r.x - 0.5, 2.0), pow(r.y - 0.5, 2.0));
    p *= 1.0 - pow(min(1.0, 12.0 * dot(r, r)), 2.0);

    fragColor = vec4(COLOR, 1.0) * p;
}
Passing a texture into a shader is similar to passing one into a normal material but we need to set up the texture on the uniforms.
First we'll add the uniform for the texture to the shader. They're referred to
as sampler2D in GLSL.
const fragmentShader = `
#include <common>

uniform vec3 iResolution;
uniform float iTime;
+uniform sampler2D iChannel0;

...
Then we can load a texture like we covered here and assign the uniform's value.
+const loader = new THREE.TextureLoader();
+const texture = loader.load('resources/images/bayer.png');
+texture.minFilter = THREE.NearestFilter;
+texture.magFilter = THREE.NearestFilter;
+texture.wrapS = THREE.RepeatWrapping;
+texture.wrapT = THREE.RepeatWrapping;
const uniforms = {
  iTime: { value: 0 },
  iResolution:  { value: new THREE.Vector3() },
+  iChannel0: { value: texture },
};
So far we've been using Shadertoy shaders as they are used on
Shadertoy.com, namely drawing to cover the canvas.
There's no reason we need to limit it to just that use case though. The
important part to remember is the functions people write on shadertoy generally
just take a fragCoord input and a iResolution. fragCoord does not have to
come from pixel coordinates, we could use something else like texture
coordinates instead and could then use them kind of like other textures. This
technique of using a function to generate textures is often called a
procedural texture.
Let's change the shader above to do this. The simplest thing to do might be to
take the texture coordinates that three.js normally supplies, multiply them by
iResolution and pass that in for fragCoords.
To do that we add in a varying. A varying is a value passed from the vertex
shader to the fragment shader that gets interpolated (or varied) between
vertices. To use it in our fragment shader we declare it. Three.js refers to its
texture coordinates as uv with the v in front meaning varying.
...

+varying vec2 vUv;

void main() {
-  mainImage(gl_FragColor, gl_FragCoord.xy);
+  mainImage(gl_FragColor, vUv * iResolution.xy);
}
Then we need to also provide our own vertex shader. Here is a fairly common
minimal three.js vertex shader. Three.js declares and will provide values for
uv, projectionMatrix, modelViewMatrix, and position.
const vertexShader = `
  varying vec2 vUv;
  void main() {
    vUv = uv;
    gl_Position = projectionMatrix * modelViewMatrix * vec4( position, 1.0 );
  }
`;
We need to pass the vertex shader to the ShaderMaterial
const material = new THREE.ShaderMaterial({
  vertexShader,
  fragmentShader,
  uniforms,
});
We can set the iResolution uniform value at init time since it will no longer change.
const uniforms = {
  iTime: { value: 0 },
-  iResolution:  { value: new THREE.Vector3() },
+  iResolution:  { value: new THREE.Vector3(1, 1, 1) },
  iChannel0: { value: texture },
};
and we no longer need to set it at render time
-const canvas = renderer.domElement;
-uniforms.iResolution.value.set(canvas.width, canvas.height, 1);
uniforms.iTime.value = time;
Otherwise I copied back in the original camera and code that sets up 3 rotating cubes from the article on responsiveness. The result:
I hope this at least gets you started on how to use a shadertoy shader with three.js. Again, it's important to remember that most shadertoy shaders are an interesting challenge (draw everything with a single function) rather than the recommended way to actually display things in a performant way. Still, they are amazing, impressive, beautiful, and you can learn a ton by seeing how they work.